
How to maximize your impact and minimize your effort…

As a plant specialist for Pacific Garden Design, I frequently encounter customers that have been misled to believe that roses are the only summer-long, blooming perennials that are hardy enough for our fairly harsh climate. Between weather that hovers right around 0° for weeks on end, and months of extreme high desert heat, it’s easy to forget about some of the other hardy perennials that thrive in our region. To counter that misinformation, I’ve compiled a short list of my favorite summer-long-bloom perennials for our complex region!
If you’re anything like me, I love filling my garden with plenty of pollinators for our honey bee and butterfly friends! Echinacea, commonly known as Coneflowers, are a beautiful, upright, summer perennial that many know and love. Not only are they USDA Zone 5 hardy, they also put on a dazzling display of color nearly all summer long. With a practically limitless selection of colors, there’s always a color to match your garden’s style.
Another tall, upright perennial, whose color we can enjoy for months, is Alcea rosea, or Hollyhock. Their long stalks and layered flowers nicely border buildings or fences, creating a fully floral addition to your landscape. Like echinacea, they are perfect for local pollinators, and come in a variety of colors. Unlike echinacea, Hollyhock can reach up to 7’ tall; that being said, be choosy about where you plant this one! Another bonus of Hollyhock is its deer-resistance, cold hardiness, and drought tolerance.
Let’s change it up a bit with a fan-favorite, the Hardy Geranium, commonly known as Cranesbill. Flowers, and deer-resistance, and drought tolerant, oh my! These are a few of our favorite things, but this low-grower provides beautiful blooms all summer long that are perfect as a ground cover or garden filler. They bloom from late spring to mid-autumn and are a vibrant addition to the sunnier areas of your landscape. Unless you want them to sprawl and drape over a wall, I recommend cutting them back after their first bloom to help them keep a compact shape.
Next on the docket is one of the most forgotten and underrated summerlong bloomers: Astrantia, commonly known as Masterwort. Hardy for USDA zones 4-9, these delicate, star-like blooms will light up your shade or part shade garden and are wonderful for fresh or dried flower arrangements. Growing 1-2’ in height, they also come in a wide variety of colors. Related to our favorite winter-bloomer, Lenten Roses (Helleborus), this perennial blooms from early summer until the end of the growing season, and is a whimsical addition to any cottage garden.
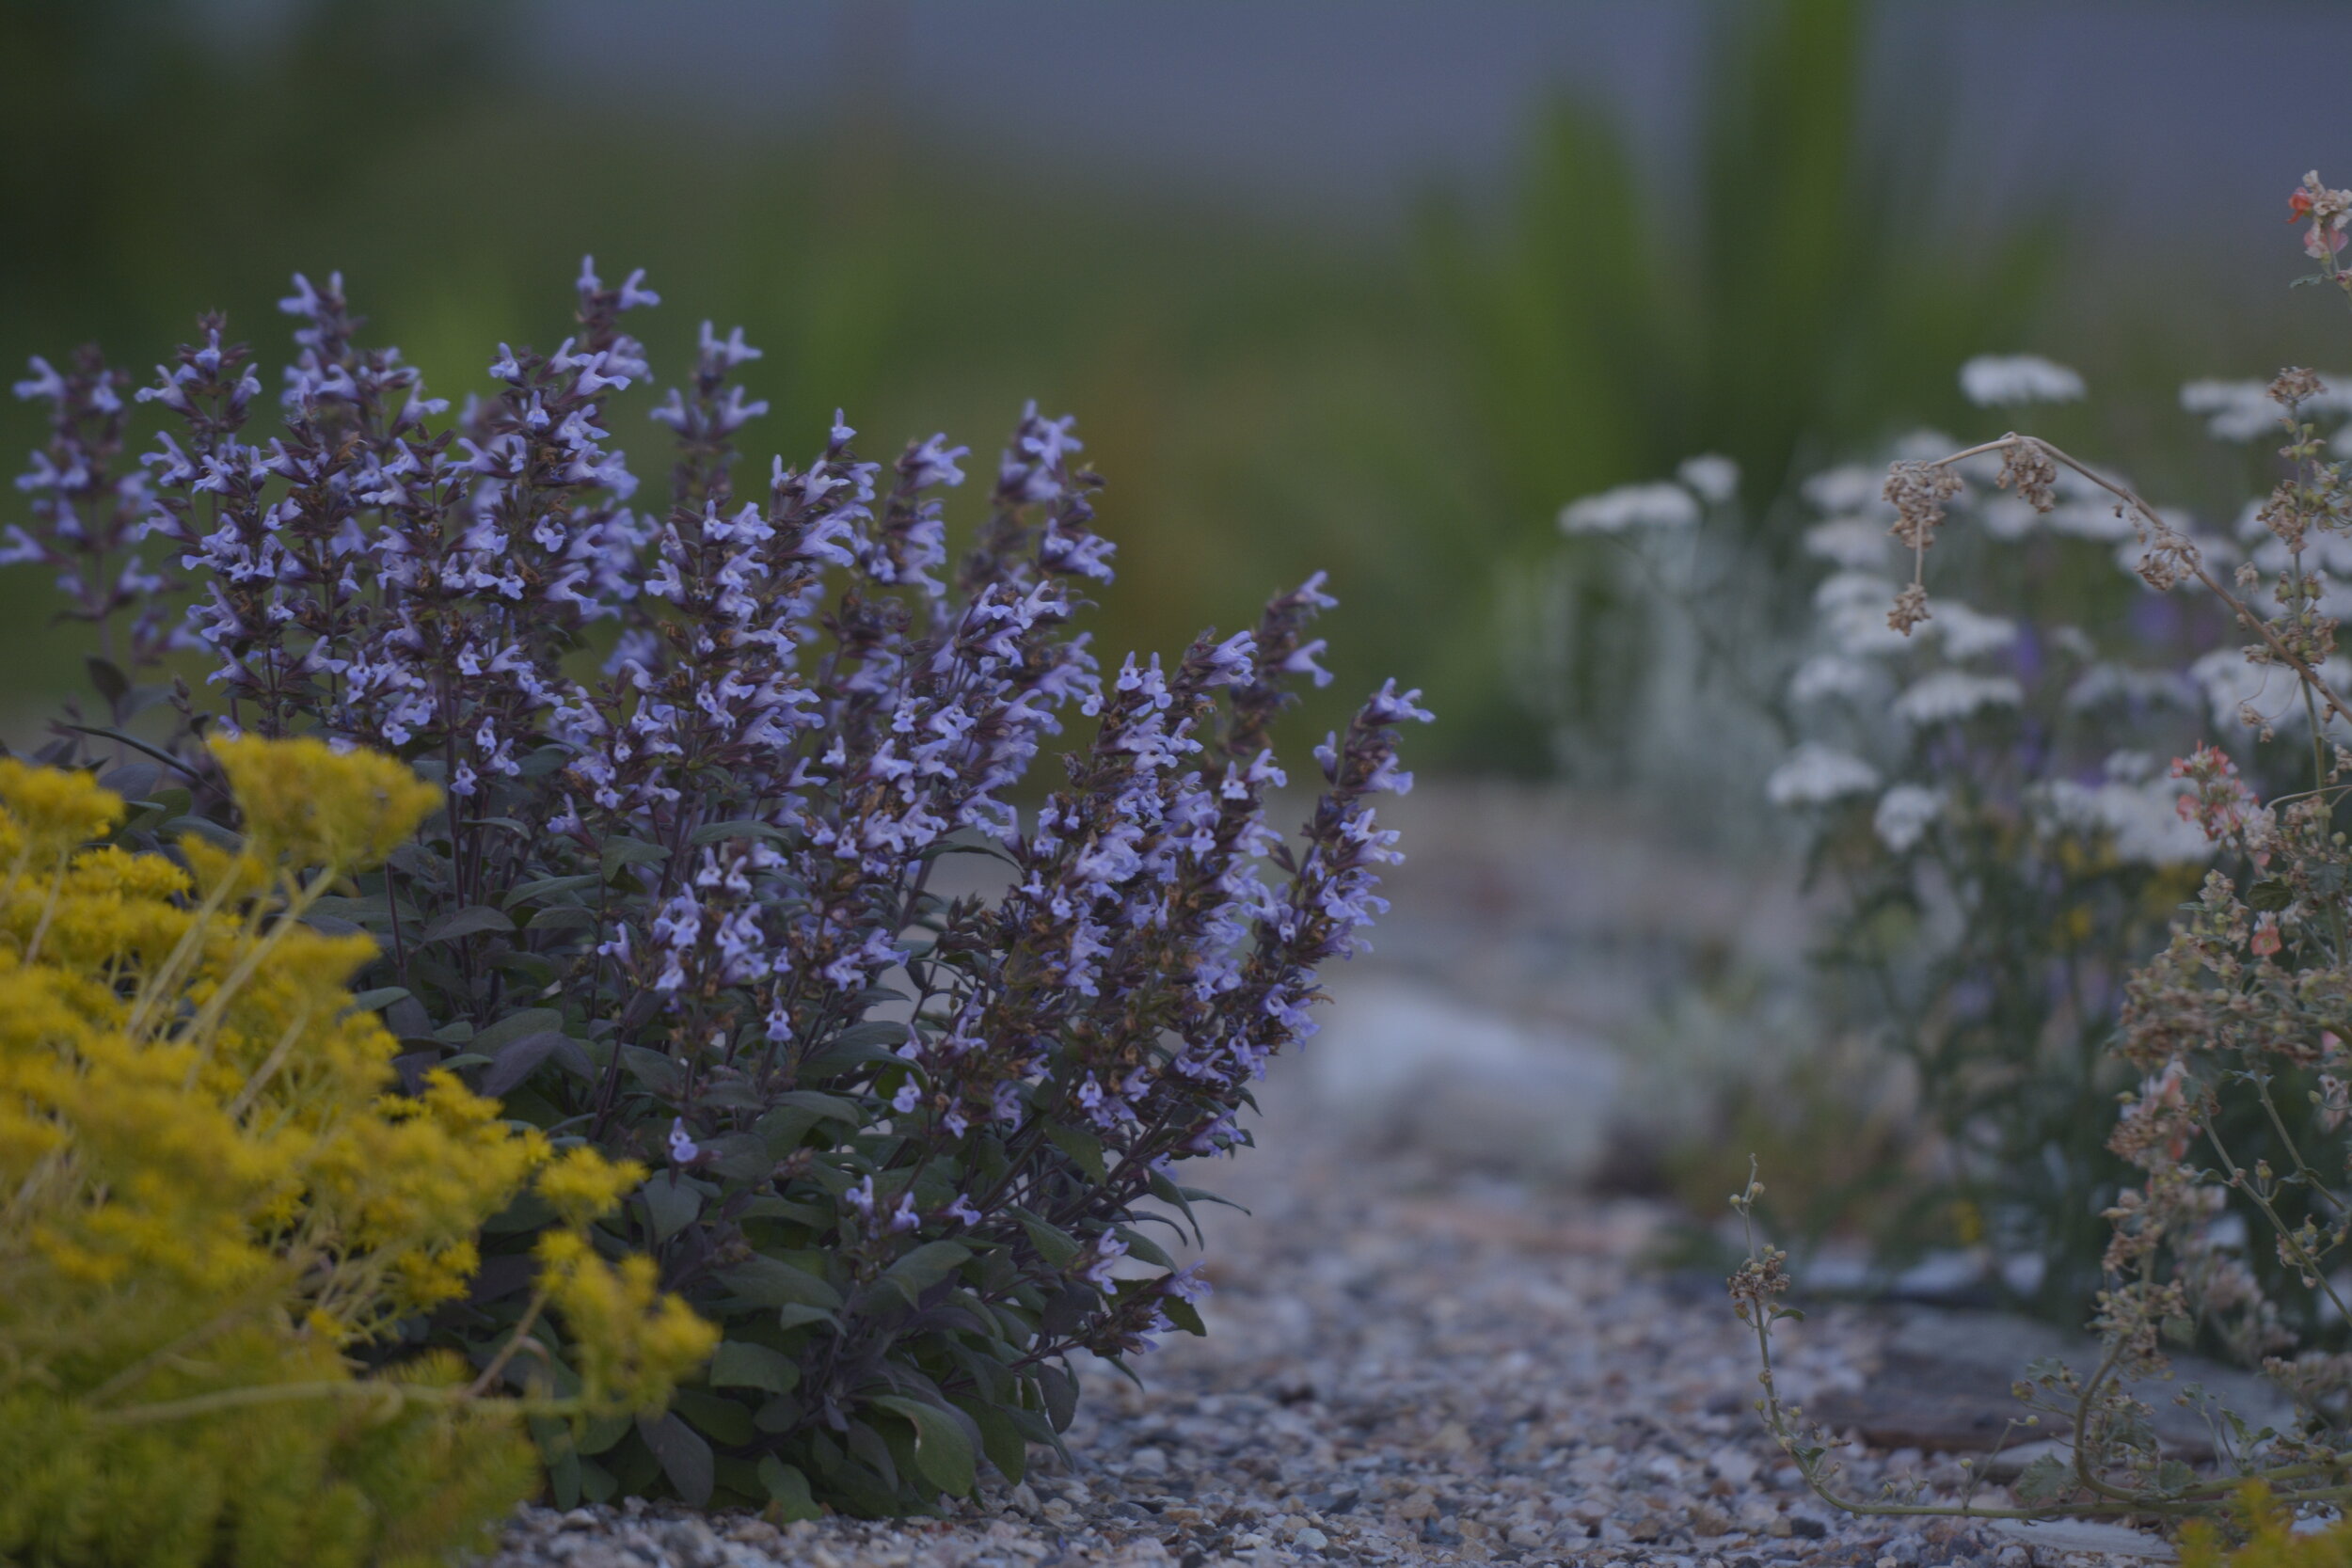
Ending on another one of my favorite herbaceous perennials is Kniphofia, commonly known as Red Hot Poker. Another tall pollinator, reaching 3-4’ in height, the bright oranges and reds that Kniphofia comes in help to curate a vibrant garden. Virtually disease-free, and resistant to deer and rabbits alike, Kniphofia brings a unique visual element to the garden without the pests!
These are just a few of some of the great summerlong blooms that our region has to offer! Zone 5 might be tough, but so are these perennials.
- Ki Stelahue, Plant Specialist for Pacific Garden Design

Red Hot Poker or Kniphofia
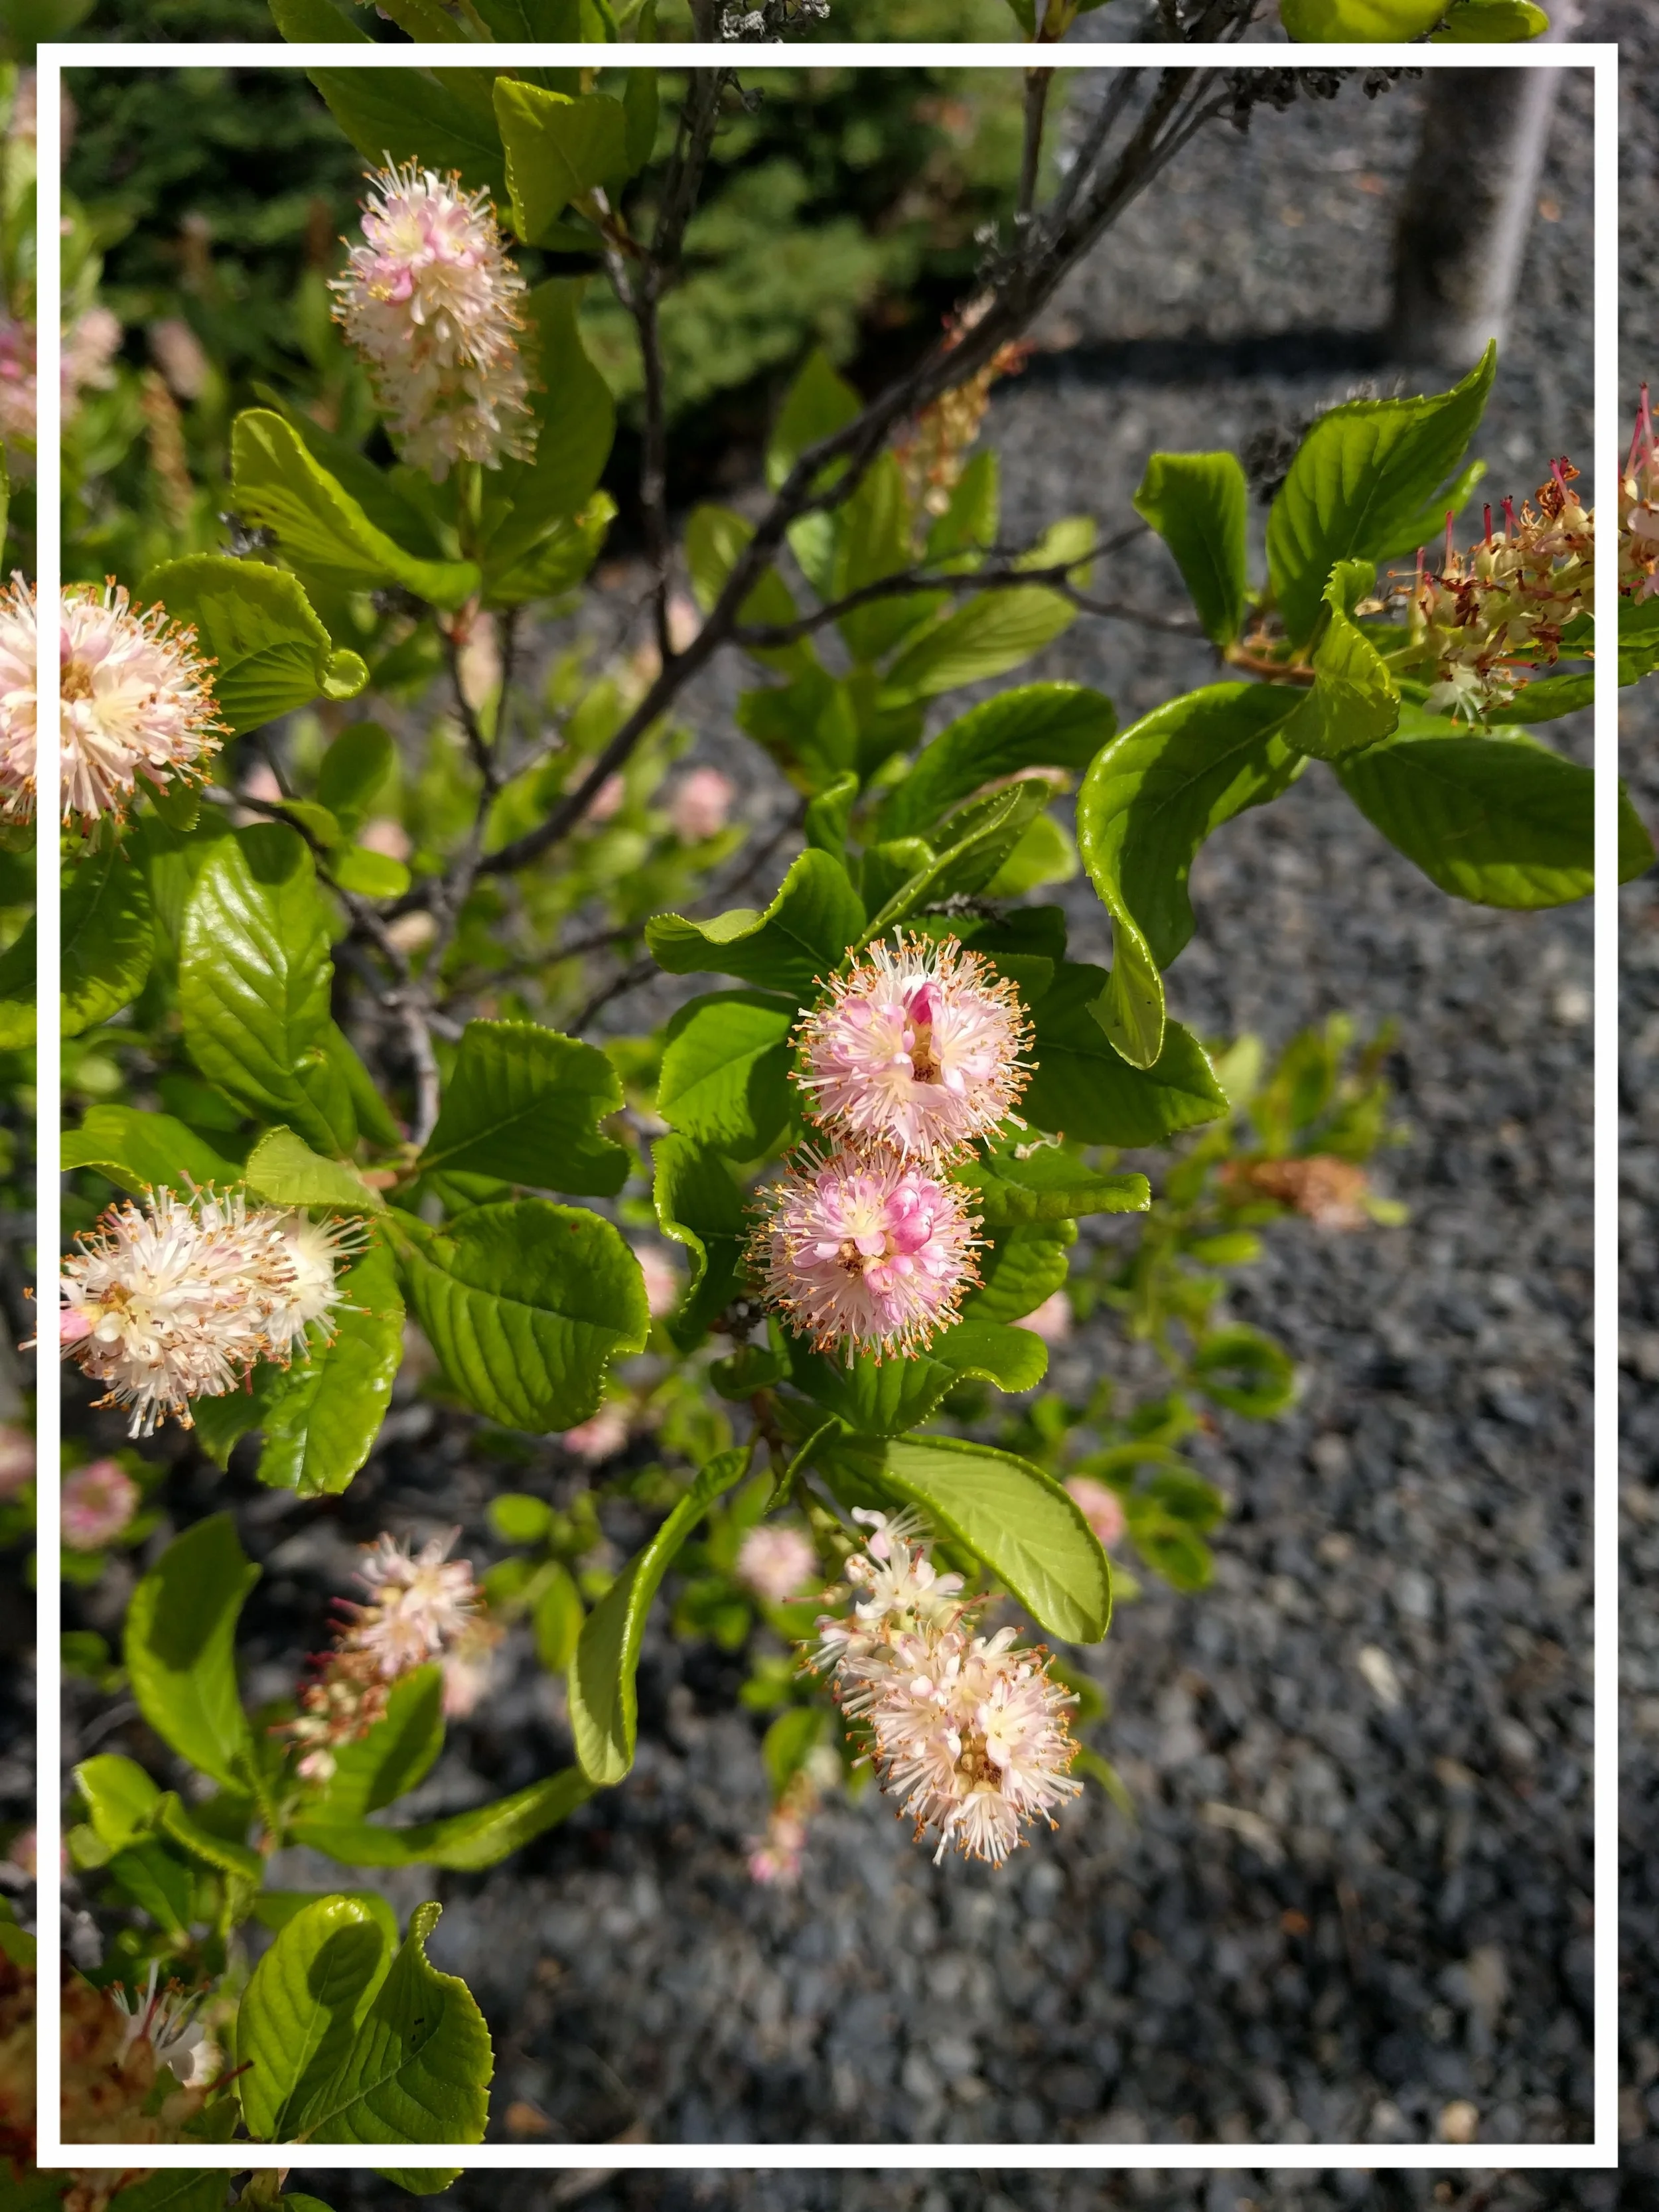
Clethra alnifolia, known as summersweet or sweet spicebush, is a medium to large shrub native to eastern North America. As it’s name suggests, its late-summer blooms are extremely fragrant. The flowers are white to deep pink, depending on the variety, and attract pollinators like butterflies.
In addition to its fragrant spikes of flowers, the dark, glossy leaves turn bright yellow in the fall, providing fantastic three-season interest for your garden. Clethra also tends to be an easy, low maintenance if it’s given the right growing conditions.
Clethra thrives in moist, acidic soils with part shade. It can generally take full sun, however, if provided with plenty of moisture. The form is generally somewhat irregular and there is a tendency to sucker, so it’s not a great choice for formal gardens. It does take pruning well, however, and can be contained at a smaller size than its natural maximum.
Clethra’s scent is the real showstopper, so make sure to locate it near a pathway, patio, or deck so you can enjoy the “summersweet” smell. But be careful not to put it too close to a living space—the pollinators it tends to attract include bees and other stingers!
Compost is a valuable resource, as its nickname “black gold” suggests. Compost extracts and teas allow you to take a limited quantity of compost and multiply its benefits. While a cup of compost can probably only treat a plant or two, the same amount can cover an entire garden in liquid form.
So what’s the difference between compost extract and compost tea? It depends on who you’re talking to, unfortunately. Composting is still largely treated as an art rather than a science, so there is no organization providing standard definitions that every composter recognizes. In general, however, compost extract is primarily a liquid fertilizer, made by simply submersing finished compost in water and allowing nutrients to leach out. Compost tea, on the other hand, has come to refer to a liquid that has been “brewed” with oxygenation and nutrients to stimulate microbial growth.
While both are liquid compost products, the differences in their manufacture leads to some significant differences in how they are best used. Compost extract can be made relatively quickly—it only takes a couple hours with some light aeration for the nutrients to leach out. While compost extract will contain most of the nutrients of the source material, it supports little of the microbial life. It is best applied to the soil, so plant roots can make use of those nutrients. Because it is not very biologically active, however, compost extract can also be stored for up to a few weeks after it’s made.
Brewing compost tea, meanwhile, focuses on breeding the microbial colonies in your compost for a biologically rich finished product. A small amount of compost is suspended in water, which is constantly aerated through the brewing process. In addition, some type of food for the microbes is added, with different foods encouraging different species to flourish. The food and oxygen create ideal conditions for microbes to multiply far beyond the typical carrying capacity of the liquid. This means that the compost tea should be applied as soon as possible after brewing, as the microbes will begin to die off as oxygen levels start to drop.
It is also beneficial to brew your compost tea at the same temperature as the environment in which it will be applied to ensure a population of microbes that thrive at those temperatures. Brewing compost tea in a cool basement and then applying it outside in 90° weather is simply a waste of all those organisms that needed the colder temperatures to thrive, as well as the resources you put into aiding their growth.
The process of making compost tea is a kind of fermentation, and the finished product has been shown to be effective in stimulating plant growth as well as treating disease. As many plant pathogens are fungal or bacterial in nature, the application of beneficial fungi and bacteria can provide an effective control. While rigorous scientific inquiry into the efficacy of compost tea is still relatively scarce, there is a lot of promise in the field, especially regarding the opportunity to develop targeted microbial preparations for specific pathogens. In the meantime, compost tea can be used as a general foliar and soil drench to provide a broad spectrum of benefits for your plants.

For a basic compost tea setup, suspend a permeable bag of finished compost in a five-gallon bucket. Add some food for your microbes and use an aquarium pump and airstones to aerate the water for 24-48 hours.
A basic set-up for brewing compost tea can be made easily at home with a couple stops at the hardware and pet store. A five gallon bucket, an aquarium pump and airstones, and a permeable bag of compost will get you started. The airstones will oxygenate the water, allowing microbial populations in the compost to multiply. The addition of some type of food for the microbes is also important to microbial growth, and can even help determine what microorganisms will thrive. Simple sugars like corn syrup encourage bacterial growth, while oatmeal and other grains tend to support more fungal growth. Molasses, however, tends to be one of the most popular foods for compost tea because of its easy availability and its balanced support of both bacteria and fungi.
If you are on a municipal water system, you are almost guaranteed to have chlorinated water, which will inhibit the growth of bacteria and fungi. While that is great for city drinking water, it’s less helpful for compost tea and extract, as it indiscriminately kills both bad and good microbes. Chlorine will naturally off-gas in about 24 hours in a five gallon bucket, or you can pre-aerate the water with your air stones for a couple hours to speed up the process. Beyond the removal of chlorine, there is little agreement on what specific effects water type (well water, distilled, reverse osmosis, even homeopathic “living water”) has on the growth and population of bacteria and fungi in compost tea. Microbe populations can shrink and grow extremely rapidly—an individual bacterium can divide itself in as little as every 12 minutes, and can die just as quickly—so anecdotal evidence of home brewers is simply not rigorous enough to provide a reliable link between the source water and finished compost tea microbe populations.
While bacteria multiply rapidly in compost tea, fungi take longer to reproduce and will generally just grow into larger organisms during the brewing cycle. The key to a fungi-rich compost tea is to maximize the number of fungal hyphae in your starter compost. The process is somewhat like making compost tea, in that you provide food to encourage the reproduction of your target organisms. Growing fungus, however, takes a several days, versus compost tea’s 24-48 hours. And while fungi do like to be damp, you are still aiming for a solid compost product—just with a lot more fungus. Mix four parts compost to one part fungal food like ground oatmeal, powdered malt, or fish hydrolysate and store in a warm, dark place for about a week. The fungi should have grown and be visible as white, threadlike organisms throughout the compost, which can then be used to produce a fungus-rich compost tea.
Worm bins are one of the most common methods of indoor composting. Also known as vermicomposting, worm bins are great for apartments and offices with no outdoor space and climates where cold temperatures preclude winter composting. They’re also a great tool to get younger children engaged in composting with their accessible and dynamic ecosystem.
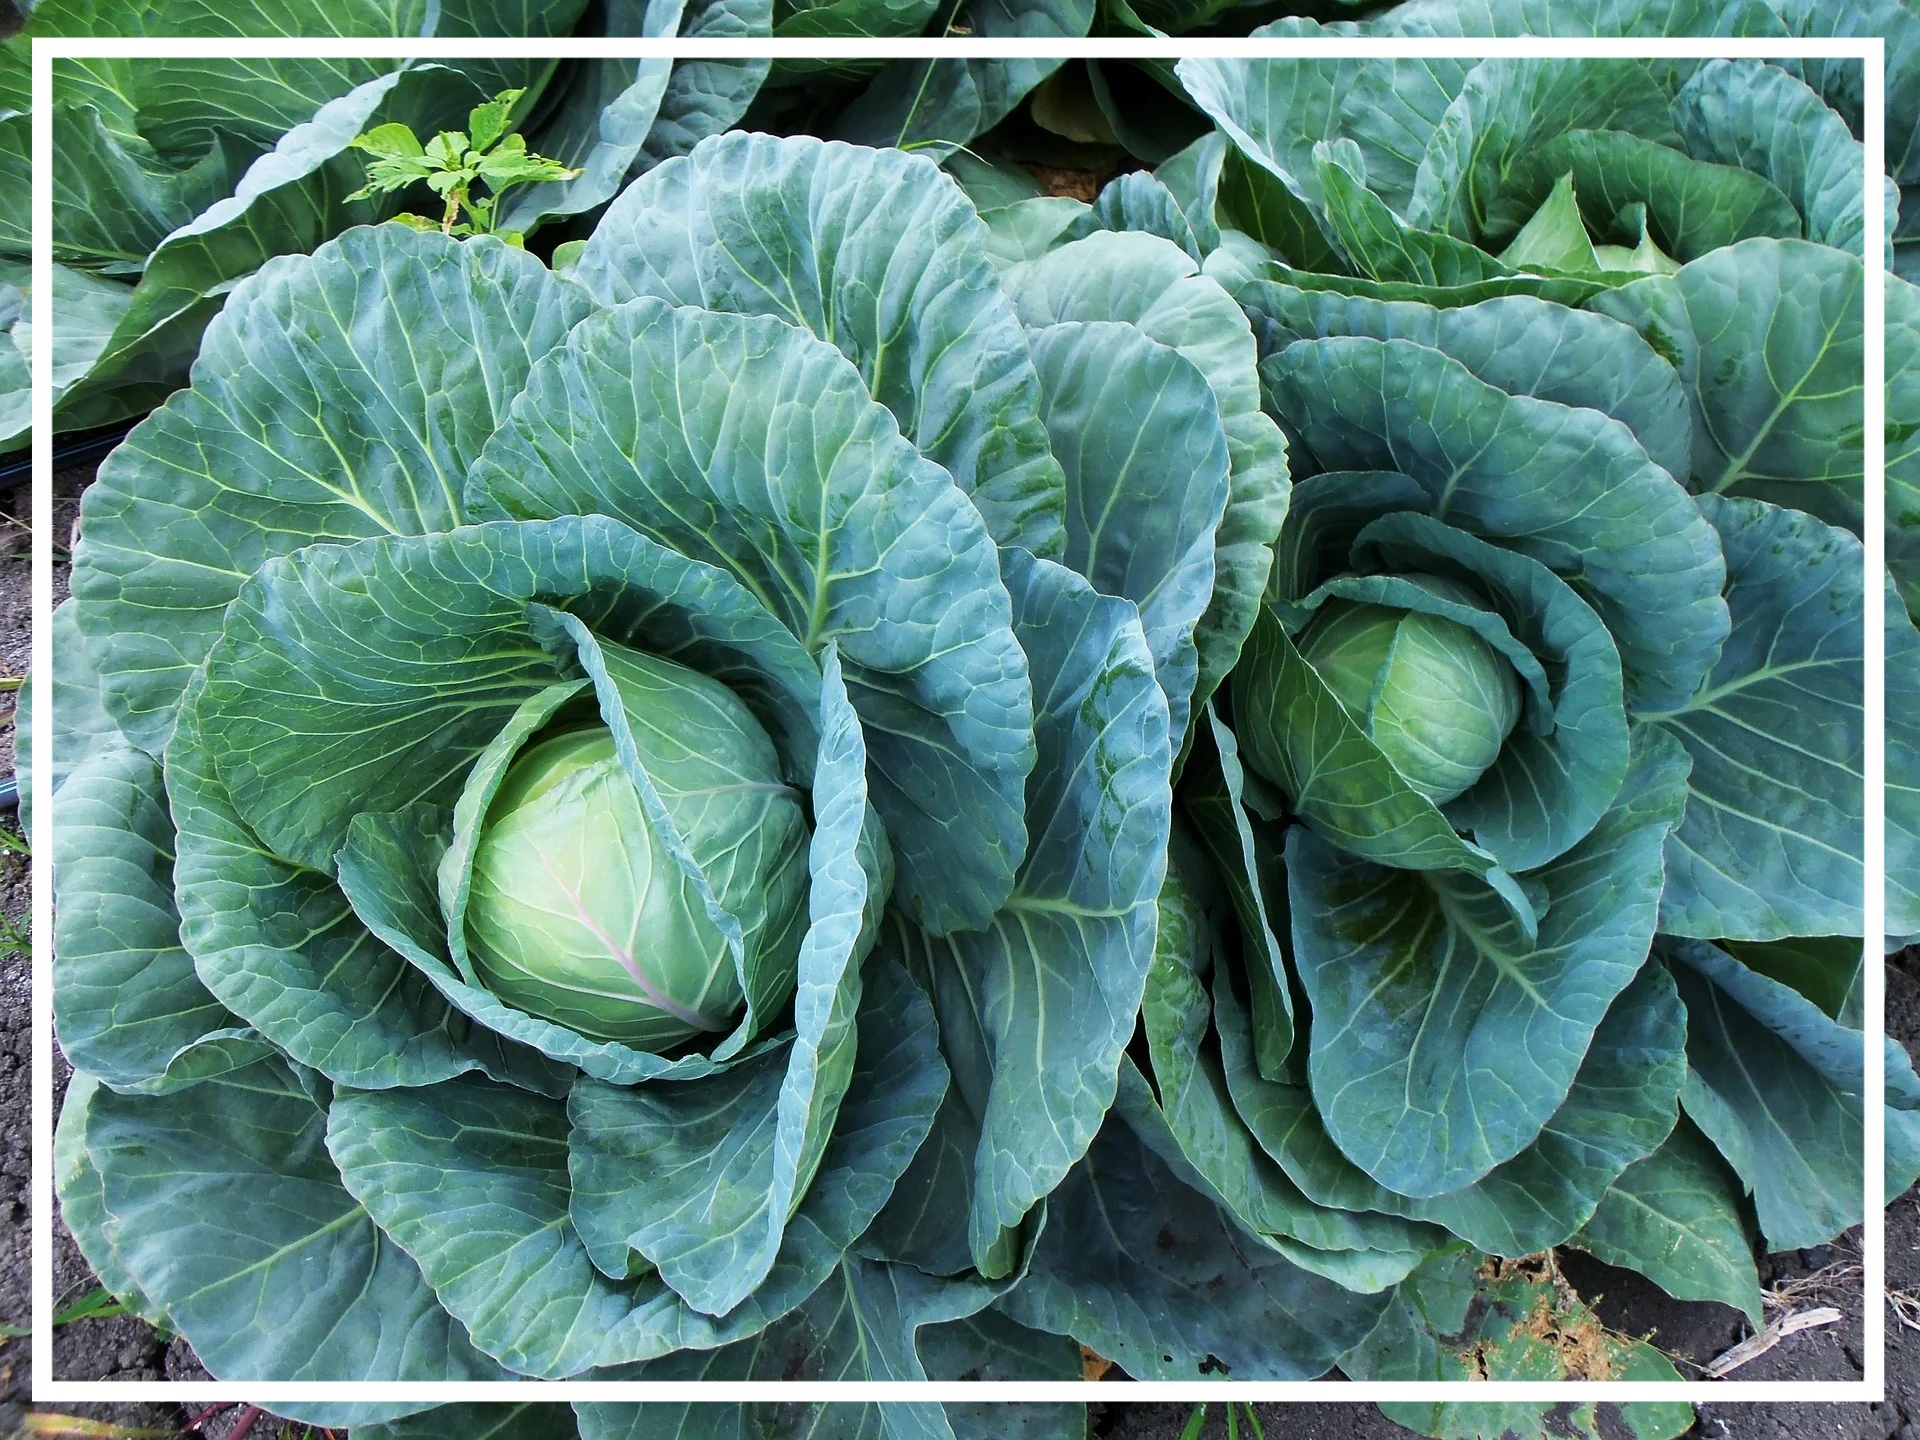
Worms tend to avoid plants in the brassica family.
Contrary to their reputation, worms are not able to eat anything and everything you put into a worm bin. Large quantities of citrus should be avoided, as it contains a compound poisonous to worms. Brassicas (cabbage, kale, broccoli, cauliflower, Brussels sprouts, turnips, etc.) and alliums (onions, garlic, shallots, scallions, leeks, chives, etc.) are generally disliked by worms, and they often eat them so slowly that they begin to rot in the worm bin—plus, they are typically strong-smelling food scraps to begin with. Similarly, meat, dairy, and fats go rancid so quickly that they become a nuisance in a typical worm bin, producing foul odors and attracting unwanted pests.
While worms can certainly break down food, their systems are not capable of killing harmful pathogens like a hot compost pile would. For that reason, it’s important not to add dog or cat (or human!) waste to a worm bin. Like worms, their digestive systems process food too quickly to destroy harmful parasites or bacteria. In addition, try to avoid adding any non-biodegradable materials to the worm bin, like rubber bands and produce stickers. While they won’t normally hurt the worms, they also won’t decompose at all and will cause trouble for you with your finished vermicompost.
Worm bins can come in many forms, but there are few things that are important to consider in any design. Worms breathe through their skin and need to stay moist to do so, and dark, damp environments keep them from drying out. They thrive at moderately warm temperatures and should be protected from extreme heat or cold. While worm bins should be covered to prevent excessive moisture loss, they do still need to admit enough fresh air for the worms to breathe.
Almost as important are considerations of your own needs. Is your bin sized appropriately for the amount of food waste you’ll be feeding your worms? Will it fit in the space you have available to store it, or is it something you’ll be happy looking at if it’s out in public? Do you want a system that naturally separates the worm castings from the active worms, or are you willing to do that yourself? Do you have the time and resources to DIY your bins, or are you looking for something ready-made?
A basic worm bin can easily be constructed from a single plastic tote with ventilation holes, but many people prefer a style that simplifies the process of harvesting the worm castings. Most commercially available worm bins feature a multi-level system that allows worms to migrate from one area to the next. Worms go where the food is, and simply adding a new level with bedding and food will draw them in, leaving the finished castings behind. In addition to ready-made bins, this style of bin is easy to make at home with a series of of buckets or bins.
Worm bins can be used outdoors as well, although freezing temperatures will be fatal. Bins that give the worms direct contact with the ground will allow them to migrate below the frost line, but if you want to give your worms in enclosed bins a chance, you’ll need to either release them or bring the whole bin inside. Worm eggs, on the other hand, can make it through harsh winters, so even if you lose all your worms, you have a good chance of a fresh population in the spring.
Outdoor worm composting can be as simple as tossing your food scraps in pile and waiting for the worms to arrive. Predators, however, become an issue for outdoor worm bins, so some type of lid or cover is advised. Many outdoor worm bins that are available to purchase do double duty as benches or stools, with attractive wood exteriors. Worm tubes, where a perforated tube is buried vertically in the garden with its end exposed, are another option for outdoor worm composting. Food scraps are dropped into the open end of the tube to feed the worms, who enter and leave the tube freely, aerating and fertilizing the surrounding garden soil in the process.
Like any form of composting, worm bins don’t always function according to plan. With a box of living animals, however, the stakes are a little higher than with a standard outdoor compost pile. Below are a few common worm bin problems encountered and some ways to remedy them.
Too Much Moisture: One of the most common problems for vermicomposters is the accumulation of water in the worm bin. The water can come from many sources, but it can also be remedied a number of ways. Some people set up their worm bins so that any excess liquid drains out and is captured outside the bin. You can also physically remove the water from bins without drainage, whether by carefully tilting and pouring or using a turkey baster. The liquid removed is rich in nutrients and can be used to fertilize plants in the garden or indoors, as long as it is removed before it goes rancid. You can also mitigate moisture issues by adding more dry bedding to the worm bin and halting the addition of water-rich food scraps, like melons or lettuce, until a better balance is achieved.
Rotting Food: Rotting food can be the result of giving your worms unsuitable materials like dairy and fats, but it can also result from simply feeding the worms too much food in general. If there is more food than the worms can handle, some will inevitably start rotting before they ever have a chance to get to it. For one-off events like a party or the holidays, the extra food can be rationed and frozen so that it can be fed to the worms gradually. If you’re dealing with a chronic overfeeding problem, however, it may be time to invest in a larger system or an additional bin.
Flies: One of the most annoying problems with worm bins is certainly the tiny flies they can attract. Some food waste may have fly eggs or larvae on the surface, which later hatch in the worm bin. The decomposing food can also provide a welcome spot for nearby flies to lay their eggs. Covering the ventilation holes with a fine mesh can help, although there will still be opportunities for flies to enter and exit when you open the bin to add food. Burying the food you add under a layer of bedding will also go a long way towards reducing the odors that attract flies. Finally, freezing food waste before you add it to the worm bin will kill any eggs—just let it thaw before adding it to the worm bin.
